
Every homeowner, parent, and renter eventually confronts the same logistical headache: a towering, solid-wood dresser that desperately needs anchoring, standing against a section of wall where the studs are nowhere near the piece’s structural corners. In an ideal room layout, every tall piece of furniture would align symmetrically over 16-inch-on-center wall framing. In reality, electrical boxes, cold-air returns, plumbing stacks, and awkward room layouts routinely position heavy furniture directly over empty drywall bays.
Skipping the anchoring step because you lack a stud in the right spot is a dangerous gamble. A fully loaded six-drawer dresser can easily weigh well over two hundred pounds. When multiple drawers are pulled open simultaneously, or when young children use open drawer handles as a makeshift stepladder, the center of gravity shifts forward in an instant. While fastening directly into dimensional lumber remains the gold standard, modern mechanical anchors make it entirely possible to secure heavy furniture into hollow drywall safely and permanently. The secret lies in understanding how tip-over physics works and choosing fasteners that clamp across the rear surface of the gypsum board rather than depending on friction.
Why Standard Plastic Wall Anchors Fail Under Load
Before picking up a drill, you must understand why the cheap plastic hardware bundled with most flat-pack furniture should never be used on hollow walls. Those small, ribbed plastic sleeves and conical expansion plugs are designed almost exclusively for shear load—a downward force that pulls parallel to the wall, such as a framed painting hanging flat against the paint.
Furniture tip-over generates tensile force, which is a direct, horizontal pull perpendicular to the wall surface. When a tall dresser tilts forward, the top edge acts as a lever arm that magnifies the pulling force on the wall bracket. Under this kind of dynamic stress, a standard plastic plug will simply shear the paper facing and strip out of the crumbly plaster core under as little as twenty or thirty pounds of pull. Self-drilling zinc screw-in anchors fare little better; while they hold up well for hanging floating shelves, sudden shock loads easily pulverize the gypsum surrounding their wide threads.
Securing a heavy dresser requires hardware capable of bearing at least one hundred pounds of continuous tensile load per anchor point, distributing that tension across a wide surface area behind the drywall sheet.
The Best Hollow-Wall Fasteners for Furniture Anchoring
To achieve a rock-solid anchor in the absence of wood framing, you must rely on fasteners that mechanically lock behind the wallboard.
Heavy-Duty Strap Toggles
Strap toggles, commonly sold under the Snaptoggle brand name, represent the most dependable hollow-wall anchor available for furniture safety. Unlike old-fashioned spring toggles, a strap toggle features a solid, threaded steel channel attached to flexible plastic guiding straps. Once you drill a hole and slide the metal channel through the drywall, the channel flips flat against the hidden back face of the board.
A sliding plastic cap then ratchets tight against the front face of the drywall, locking the metal channel firmly in place before the machine screw is even introduced. This clever mechanism allows you to thread your bolt in and out without losing the anchor inside the wall cavity. A single quarter-inch strap toggle installed in standard half-inch drywall provides a tensile pull-out rating well above two hundred pounds, providing exceptional holding power against tip-overs.
Traditional Spring-Wing Toggle Bolts
Spring-wing toggle bolts operate on the same mechanical principle but use two spring-actuated metal wings mounted on a threaded machine bolt. The wings fold flat so they can be pushed through a pre-drilled opening, springing open once they clear the back edge of the drywall.
While spring-wing bolts offer tremendous tensile resistance, they are slightly more frustrating to install. You must thread the bolt through your mounting bracket and any necessary washers before pushing the wings through the wall. If you ever need to back the screw out to move the dresser, the spring wings detach and drop down inside the wall cavity forever. Still, for a permanent setup, an all-metal, quarter-inch toggle bolt is exceptionally strong and reliable.
Steel Hollow-Wall Drive Anchors
Often called molly bolts, these all-metal sleeves feature slotted legs that collapse outward into four wide-bearing ribs as the center screw is tightened. Once fully compressed against the backside of the drywall, the threaded sleeve remains permanently fixed in place. If you opt for molly bolts, ensure you purchase heavy-duty steel variants that specifically match your exact drywall thickness, which is typically half-inch in living areas and five-eighths-inch in fire-rated partition walls.
Essential Tools and Materials
Gather your supplies before sliding the dresser away from the wall:
-
Two commercial-grade anti-tip kits consisting of heavy-gauge steel L-brackets or braided stainless steel aircraft cables. Avoid woven plastic straps, which degrade over time.
-
Two to four 1/4-inch heavy-duty strap toggles with matching machine bolts.
-
Four heavy-gauge wood screws (1 to 1.5 inches long) for securing brackets to the dresser frame.
-
Wide steel fender washers to prevent screw heads from pulling through the brackets.
-
A cordless drill with appropriate drill bit sizes (usually 1/2-inch for strap toggles).
-
A stud finder to confirm the hollow cavity is entirely free of hidden framing, electrical conduit, or plumbing lines.
-
A level, pencil, and vacuum cleaner.
Step-by-Step Installation Process
Proper technique matters just as much as good hardware. Follow these steps to ensure a flawless mount.
Step 1: Identify Solid Structural Points on the Furniture
Never attach an anti-tip bracket to the thin, cardboard-like fiberboard that covers the back of most modern dressers. You must anchor into the solid hardwood or dense engineered-wood perimeter frame, preferably the top horizontal rail or the rear corner uprights. If the back frame is hollow or recessed deeply, screw a 1×3 hardwood batten securely across the inside of the frame first to create an unyielding mounting base.
Step 2: Mark the Wall Bracket Height
Position the dresser exactly where you want it to live permanently. Using a pencil, mark the dresser’s top edge lightly on the wall. Slide the dresser out of the way.
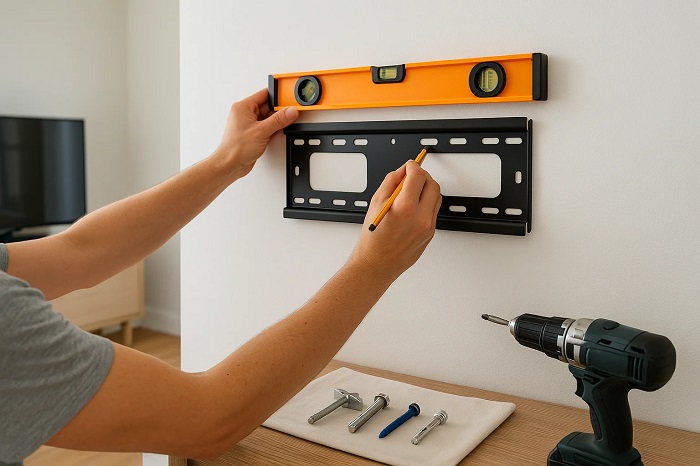
Measure down approximately one to two inches from your top-line mark. Placing the wall bracket slightly below the dresser’s top edge conceals the hardware while preserving maximum leverage against forward tipping. Use your level to mark two anchor locations, spaced as far apart as the dresser’s structural frame allows.
Step 3: Drill and Set the Toggles
Using your stud finder on deep-scan mode, verify that your marked drill points are completely clear of concealed pipes or wiring. Drill clean, perpendicular pilot holes through the drywall using the bit size specified on your toggle packaging. Hold a vacuum nozzle directly underneath the drill bit to catch falling gypsum dust.
Insert the strap toggle’s metal channel through the hole lengthwise until it pops open in the cavity behind the wall. Pull the plastic straps firmly toward you so the metal bar seats flush against the interior drywall paper, then slide the plastic retention cap snug against the wall surface. Snap off the excess plastic straps flush with the wall.
Step 4: Secure the Brackets and Tension the Restraints
Place a steel fender washer onto each machine bolt, slip the bolt through your wall bracket, and hand-thread it into the seated toggle channel. Tighten the bolt with a hand screwdriver until snug. Avoid using an impact driver, which can easily over-torque the bolt and crush the drywall core.
Fasten the corresponding brackets to the solid frame of the dresser using your heavy-gauge wood screws. Walk the dresser back into place, attach the aircraft cables or interlocking brackets, and pull them taut. The dresser should sit firmly against the baseboard with zero forward slack.
Proactive Habits to Minimize Tipping Risk
Hardware is your final line of defense, but basic physics can prevent tip-over forces from occurring in the first place.
Always distribute weight with intentionality. Place heavy items like denim, winter bedding, and thick sweaters in the bottom drawers, reserving top drawers exclusively for light garments like socks and t-shirts.
Additionally, check the leveling feet at the base of your dresser. Adjust the front feet slightly higher than the back feet so the entire unit tilts back toward the wall at a subtle one- to two-degree angle. This gentle backward pitch works with gravity rather than against it, ensuring that open drawers do not pull the center of mass past the dresser’s front footprint.